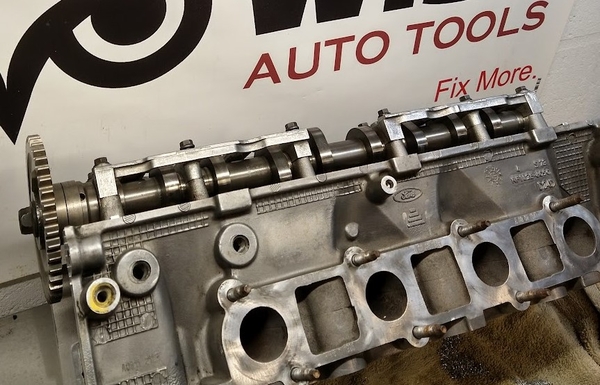
Broken Exhaust Manifold Studs: Do's and Don'ts

Hey there, Dennis here, and today we're talking broken exhaust manifold studs/bolts. Now, I know you're probably feeling a bit "exhausted" just thinking about it, but don't worry. I've got the tools, tips, and tricks to help you tackle this challenge and in the end feel like a stud. We're talking drilling, removal, extraction, re-threading, and even touch on the "welding a nut" method. Broken studs can cause all sorts of trouble, from aggravating exhaust leaks to triggering those dreaded lean codes. But don't worry, because I'm here to guide you through the do's and don'ts of each step. So grab your tools and get ready to fix your ride. It's time to get those broken exhaust manifold studs in check and hit the road with confidence. Let's get started!
DO:
1. Do visually inspect the studs and manifold for signs of damage, such as fractures, cracks, or corrosion. If a engine light is on check to see if it is a lean code.
2. Do check for missing or loose studs or nuts.
3. Do look for signs of leaks, such as black carbon deposits or discoloration around the studs.
4. Do use a penetrating oil to loosen rust, corrosion, and seized components before attempting removal.
5. Do apply heat to the stud or nut to expand the metal and break up corrosion.
6. Do use an impact wrench or breaker bar to apply sudden, strong rotational force to loosen the fastener.
7. Do gradually increase the drill bit size when drilling out a broken stud, using a sharp drill bit designed for hardened metal.
8. Do use a center punch to create an indentation for better drilling accuracy.
9. Do protect surrounding components from metal shavings or debris during drilling.
10. Do consider using a template or drilling guide to ensure accurate drilling.
11. Do consider welding a nut to the broken stud or bolt to assist in its removal. Ensure an experienced MIG welder performs the task while taking necessary precautions to prevent heat damage and ensure sufficient weld penetration.
DON'T:
1. Don't force an easy-out extractor or a bolt extractor tool if it's not working, as it may break and make removal more difficult.
2. Don't overheat the surrounding components while applying heat to the stud or nut.
3. Don't apply excessive force or let the drill bit overheat during drilling, as it can cause damage.
4. Don't use a drilling guide with a Rescue Bit, as it requires a specific motion that a drilling guide may prevent.
5. Don't proceed with a thread chaser if the remaining threads are severely damaged or excessive material has been removed.
6. Don't forget to clean the threads thoroughly after using a thread chaser or Time Sert thread repair kit.
7. Don't assume that the thread chaser will always be effective, as its success depends on the extent of damage and the condition of the remaining threads.
8. Don't neglect to test the fit of a new stud or bolt after thread repair to ensure proper threading.
9. Don't rely solely on welding a nut without considering potential challenges. Insufficient weld penetration can make stud removal harder, and in case the weld doesn't hold, drilling becomes more difficult.
Here's a list of tools and things to consider having on hand:
Inspection camera
Wrench or socket Penetrating oil (such as WD-40 or PB Blaster)
Heat source (propane or acetylene torch, induction tool)
Impact wrench or breaker bar Impact socket
Hammer Chisel
Vise grips
Turbo socket
Left-hand drill bit
Drill
Center punch
Thread chaser
Time-Sert thread kit
Cutting oil or lubricant
Brush
Air compressor
Safety glasses
Please note that this is not an exhaustive list of all possible tools that can be used, but it covers the main tools mentioned in the article. Rescue Bits and Time Sert Kits available here at DenLors Tools, also visit WiseAutoTools.com for a larger selection of automotive tools.


